| HOME |
Clay Dolls 1 |
Ashton Drake Galleries |
Ebay |
Hair & Eye Color Options |
| Silicone Dolls to Order |
Clay Dolls 2 |
TELEVISION & Awards |
Sculpting Information |
Mommies Corner |
| Resin Dolls |
Miniature Dolls |
Frequently Asked Questions |
About the Artist |
EMAIL |
| Vinyl Kits to Reborn |
Masterpiece Dolls |
Pro-life thoughts |
How to make a Silicone Doll |
LINKS |
|
Silicone Tutorial
PAINTING SILICONE DOLLS
by Donna Lee Originals
 
Solid Silicone dolls can only be painted with silicone based products. This is because only silicone sticks to silicone.
There is no singular way to paint silicone dolls.
Described below, is the method, products, and techniques that work for me.
I buy almost everything from FACTOR 2 online.
http://www.factor2.com/
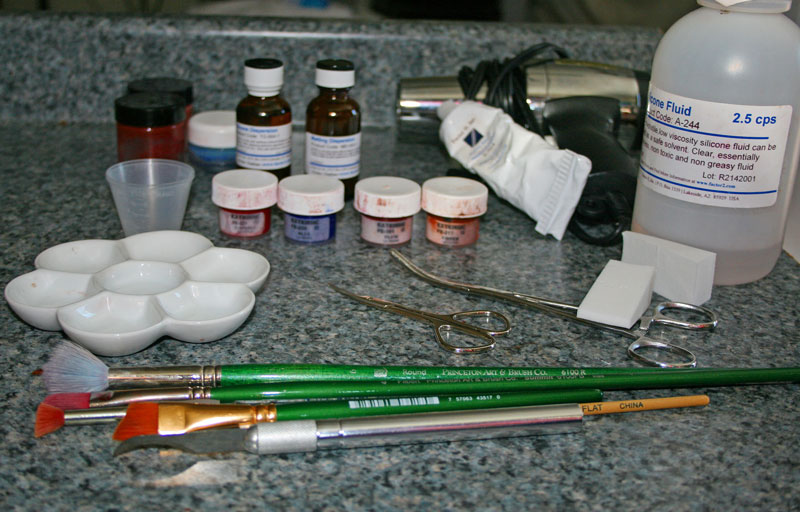
Supplies Needed:
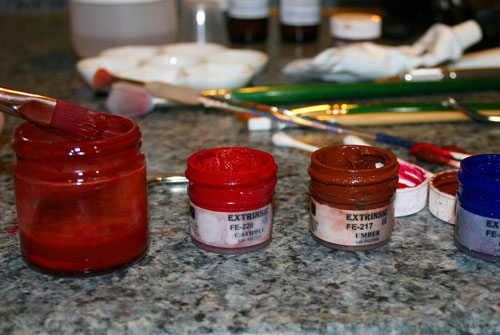
*Extrinsic Coloration FACTOR 2 Paints:
C-Stipple FE-228
Umber FE-217
Plum FE-301
Blue FE-235
White FE-200
You may substitute GENESIS BRAND paints in place of FACTOR2 paint listed above.
If you do this, make sure to mix the paints with the Factor2 Silicone Fluid, and then proffesionaly seal by using heat and the Factor2 Silicone sealer.
*Silicone fluid A-244
*Matting Agent MD-564
*Silicone Sealer TS-564
*Curved Exacto Knife
*Heat Gun
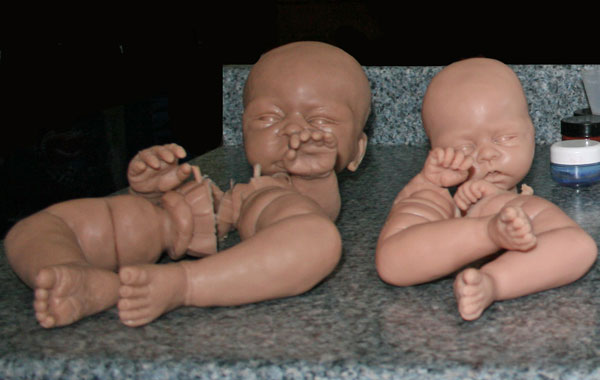
*Silicone Doll Parts
*Porcelain Mixing Tray
*Paint Mixing jars
*Hemostats
*Tiny Scissors
*Assorted Brushes
*Cosmetic Sponges
*Disposable cups
HOW TO DO IT:
The first step is to decide whether you are going to root the head before or after you paint.
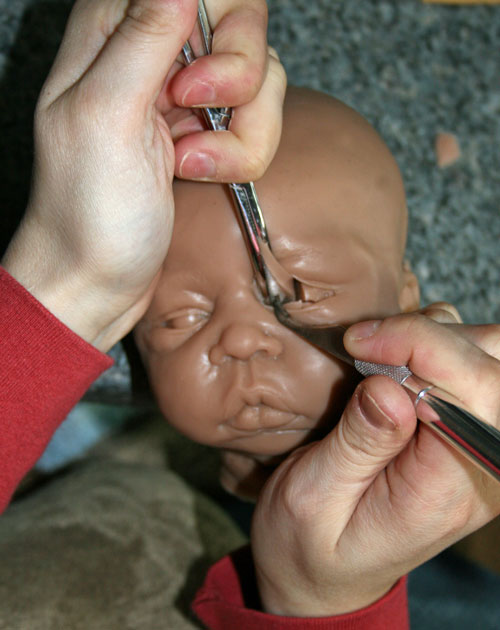
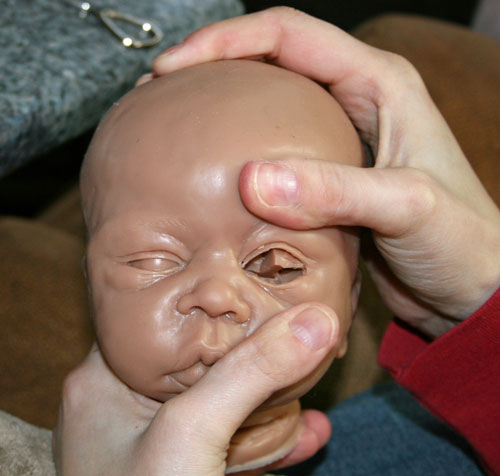
After rooting, you need to start on the eyes. If the doll’s eyes are open, you will need to cut the silicone eyeballs out using a curved blade. You do this by cutting a complete circle all the way around the eye opening.
Then make a crisscross cut in each silicone eyeball. Each eye will now be sectioned into 4 pieces.
Pull each piece out one at a time, using hemostats and your blade. This is tricky, but you will get better the more you practice.
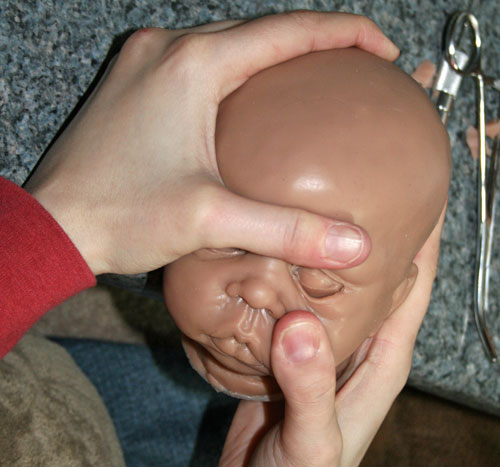
Sometimes, my husband helps by pulling the eyes open, so I can see better where need to cut.
Don’t worry if you slightly cut or tear the outer eye, you can re-silicone tears by using a 2 part silicone/activator mixture that you would get from your pourer.
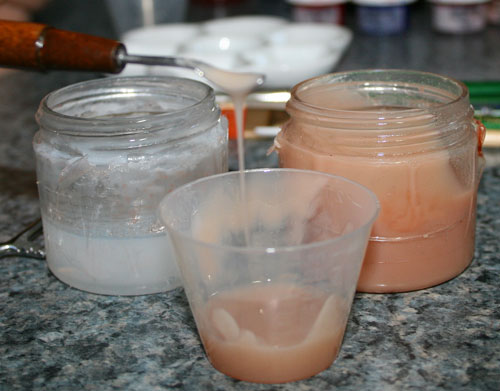
Follow your pourer's instructions on how to properly mix the silicone with the activator. Then you have to work very quickly because it hardens into solid silicone within a few minutes.
If any silicone tags remain around the eye opening, you can use your tiny scissors to trim them off the eyelids.
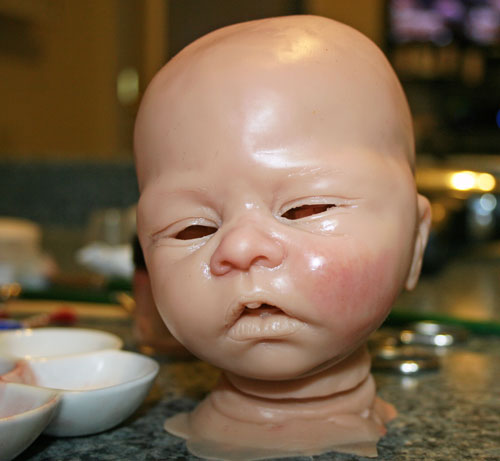
To prepare the silicone parts to receive the paint, you must now use acetone on all pieces. Afterwards, wash the pieces in a grease cutting type of dish soap (like Dawn), and let air-dry overnight.
You are now ready to paint.
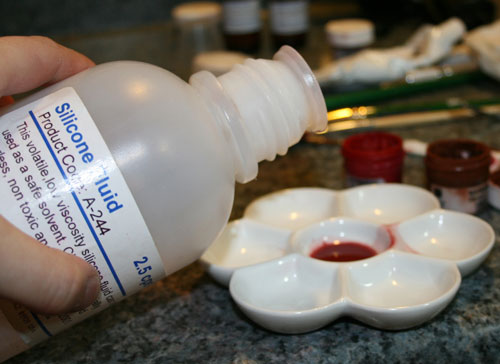
You will be using Silicone fluid A-244 to dilute the paint. I can’t say enough about this product. It's completely non-toxic, odorless, and colorless. It soaks right into the silicone, and evaporates quickly, leaving only paint behind. It is the consistency of very light oil. I even use it to dilute Genesis paints for vinyl reborn dolls.
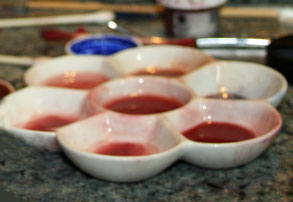
You will begin painting process by mixing together in a jar, equal amounts of Umber and C-Stipple and a tiny toothpick dot of blue. Use your Silicone fluid to dilute the paint and make a nice watercolor consistency.
The color you have mixed in the jar will be your Concentrated Blushing Color.
Now take your brush and put a few dabs of this concentrated mixture into 3 of the porcelain-mixing compartments. Add silicone fluid to dilute.
Keep experimenting to find the exact color you want for the final blushing color. Then put the Concentrated Blushing Color away to use another day.
This is how I mix my colors:
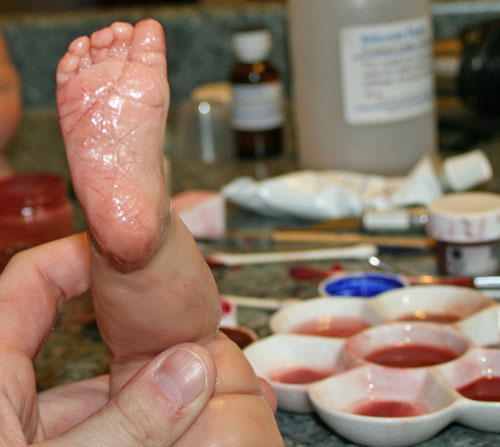
For general blushing (cheeks, elbows, knees and feet), I use the Final blushing color.
For lips, I dilute plum, umber, and some Final blushing color with silicone fluid.
For creases, I add some umber to the Final blushing color.
For eyebrows, I dilute umber with silicone fluid, and a tiny drop of Final blushing color
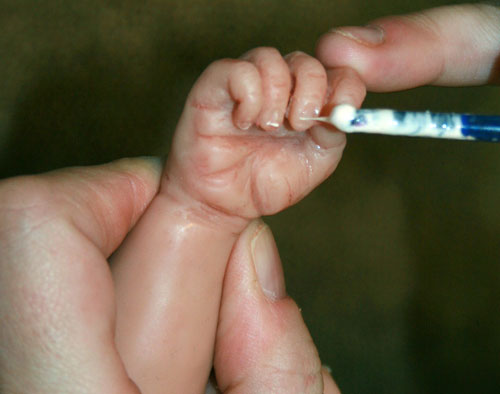
For veining, I dilute blue with the silicone fluid.
For blood vessels or stork bites, I use the lip color mixture with a tiny amount of blue to give a reddish (slightly purple) tone.
If I am painting an older baby, I paint color on with a cosmetic sponge, and then “blot” the rest off.
This gives a clean flawless look.
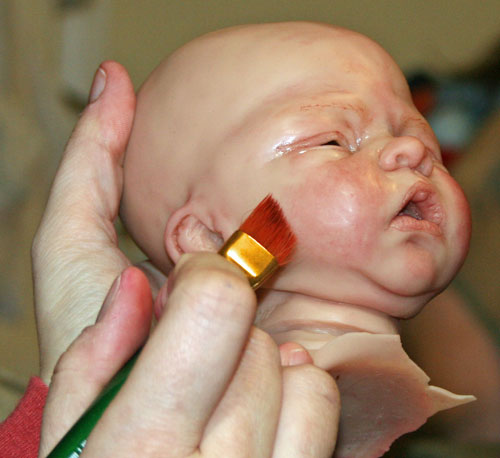
For a newborn baby, I paint color on with a brush in, say, 100 tiny dots to give a blotchy look.
Then I use an angled brush that is DRY to feather the edges of paint, and blend the painted sections into the unpainted sections.
After the first blushing, I deepen the color slightly to add more depth. I continue mixing and slightly changing colors.
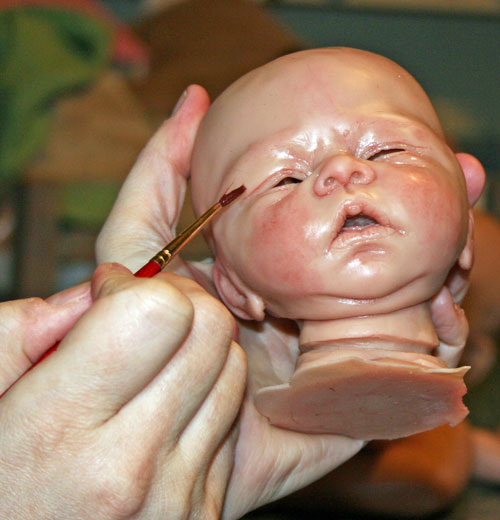
After blushing the doll. I keep change the color slightly to add depth. And then I use a very thin brush to add color to every single crease on the baby (eye creases, around mouth and nose, under chin etc).
The next part completely depends on your individualized preference. This is where I add the small details such as: delicate veins, tiny blood vessels/capillaries, realistic blemishes, milk spots, ‘stork bites’ etc.
After painting the entire doll, I let sit it for at least 48 hours.
Day 1: Apply paint
Day 2: Touch up any spots that need more paint, and paint the nail-tips.
To do the nails you need to mix a tiny pin drop amount of white paint with TS-564 Acetoxy Silicone. This product starts to harden right away, so work as quick as you can.
The mixture will be the consistency of warm taffy. You will take the end of a brush, dip it into the mixture, and pull away, thus making a long string of paint.
Allow this string of paint to gently fall onto the nail-tip in the exact position you want. It takes a lot of practice to get this perfect.
After 1 minute, the stuff thickens too much to make a thin string. So I usually have to mix a few batches in order to do one doll.
.
Day 3: Do nothing
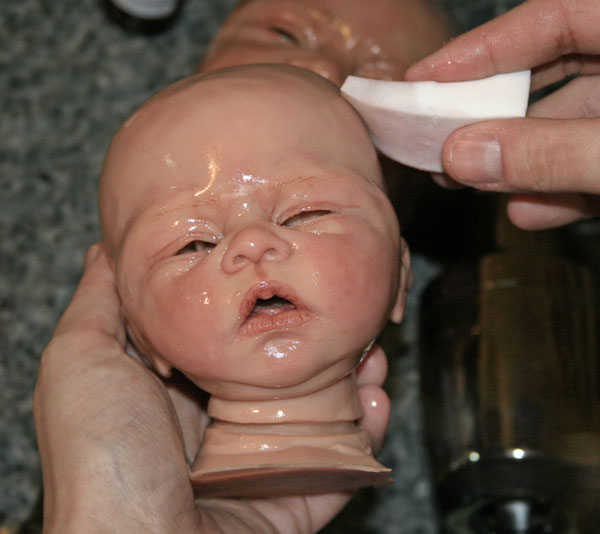
Day 4: Heat gun and apply *Silicone Sealer TS-564 . I use the heat gun to warm up the silicone; and make it easier for the sealer to adhere to the doll.
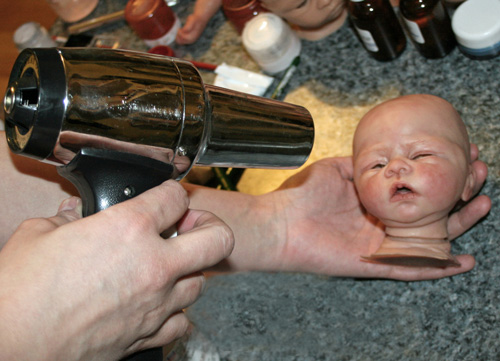
After heating up, I immediately seal the paint.
The sealer needs to go on thin by “tapping it on the face” rather than spreading and smoothing it on. I cannot stress this enough. Let it sit all day.
After several hours, I use the heat gun again; and then seal one more time with a much heavier coat of the *Silicone Sealer TS-564. The parts will be very shiny and slightly tacky after drying.
Let dry overnight.
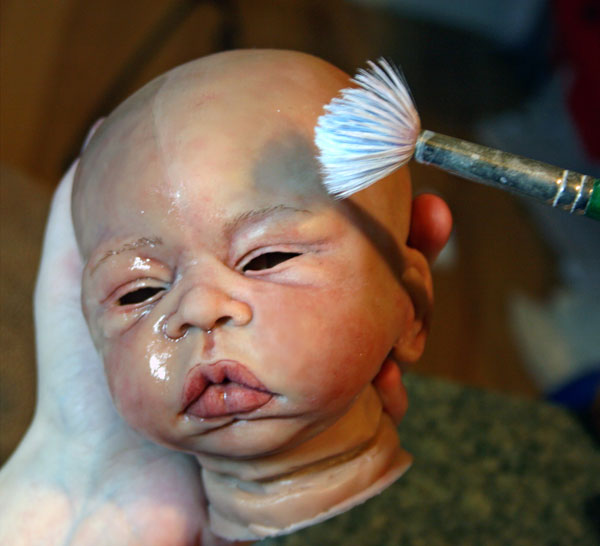
Day 5: Apply Matting Agent MD-564 liberally with a mop brush.
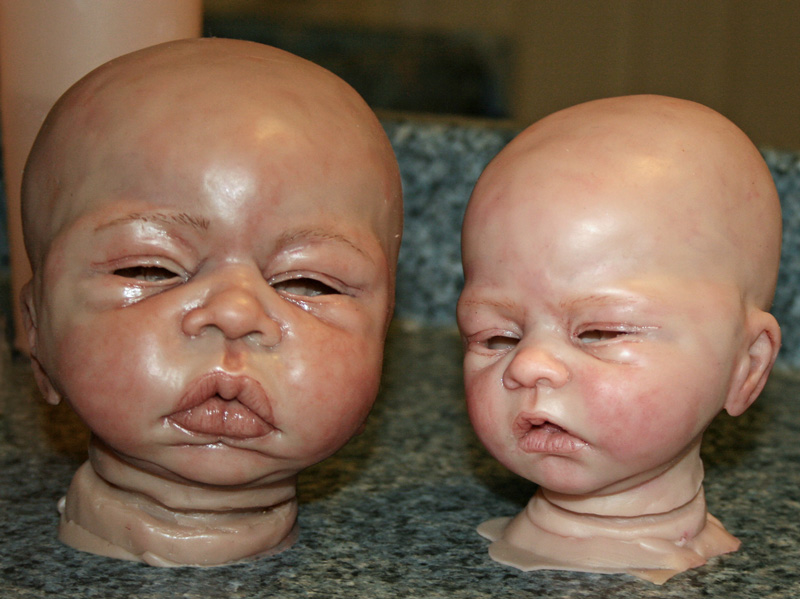
I have taken a photo showing half the face with sealer and half the face with matting agent to show the drastic difference matting agent will make.
After matting, the doll will feel somewhat sticky.
Day 6: Insert the eyes. To do this, tear off a small piece of a cosmetic sponge, and place inside eye socket. Then you gently insert the half round or oval eyes into the socket.
Glue eyes and eyelashes in place with the tiniest amount of TS-564 Acetoxy Silicone.
For squinty babies, you may need to trim the eyes with a dremel tool in order for the eyes to fit correctly.
Now all that's left is to root hair (if you haven't yet) and put on a body. I usually wait at least a week or two before shipping (or rooting) just to ensure that the paint has completely cured and adhered.
TIPS:
Never paint at night. Only paint during the natural lighting of the day for best results.
Never use sealer that is more than 6 months old, or appears to go on thicker than usual.
Never use sealer that has PARTIALLY cured in the bottle. Don’t do it. It will only APPEAR to stick to your doll, and then a day later will peel off.
Always shake the matting agent before applying.
Sometimes, after bushing the matting agent on, you will see a few small white spots. Just tap the spots with your fingers and they will go away.
Always throw the bottle away if the matting agent goes on VERY white all over..
You can use Baby Powder on doll to removes the tackiness after matting. Make sure your powder does not contain talc or it will go on shiny.
Brush lightly over silicone with a makeup brush. The baby powder gives a really nice smooth feel to the silicone, and will keep fuzzies off somewhat.
IMPORTANT NOTE: I always ask that my silicone molder/pourer use #15 sure platinum silicone.
I know a few artists that use #10 with no problems; however, I have personally painted on both the #10 and #15; and I could not get the paint to adhere on the #10.
The #15 is slightly firmer, but by using it, I have had no peeling paint issues.
I have recently been using these instructions to paint on Eco-Flex 30 soft silicone with no problems at all.
|

